Do you schedule social media updates to your social accounts in advance? Do you need a tool that does this – and much more – for a range of social networks?
You’ve probably heard of BufferApp, but you might not know about some of its advanced features. Read on to find out everything you need to know about using Buffer for social media management.
What does Buffer do?
BufferApp lets users manage a range of social media accounts, lining up updates to be shared in the future across a range of social networks.
Every time you find a post you want to share, a tweet you want to retweet, or whenever you write some content that you want to share out over time, you can add it to your Buffer. This places it in a queue and the posts are sent out in order, at times you have pre-selected.
This means that you don’t need to choose a date and time for every single post you want to schedule. You just add it to your queue, and Buffer does the work for you.
Buffer has a smooth, clean interface that is really enhanced by installing its browser extensions – a lot of its best functionality comes from these add-ons. Extensions are available for Chrome, Firefox, Safari and Opera and can be found here.
Now, let’s dive in and take a closer look at how to use Buffer to manage your social media accounts.
Connect your social media accounts to Buffer
When you have created your Buffer account, you need to start connecting your social media accounts, which you can do on this page.

You can connect accounts from a range of social networks to your Buffer. You can choose from:
- Facebook Page
- Facebook Profile
- Facebook Group
- LinkedIn Profile
- LinkedIn Page
- App.net account
- Google+ Page.
Schedule posting times
For each account you connect, you can schedule the times that posts should be shared. These can be different for every account – this is great, because you probably want to post more frequently on Twitter, for example, than you do on your Facebook Page.
Click on ‘Schedule’ on the menu across the top of the page.
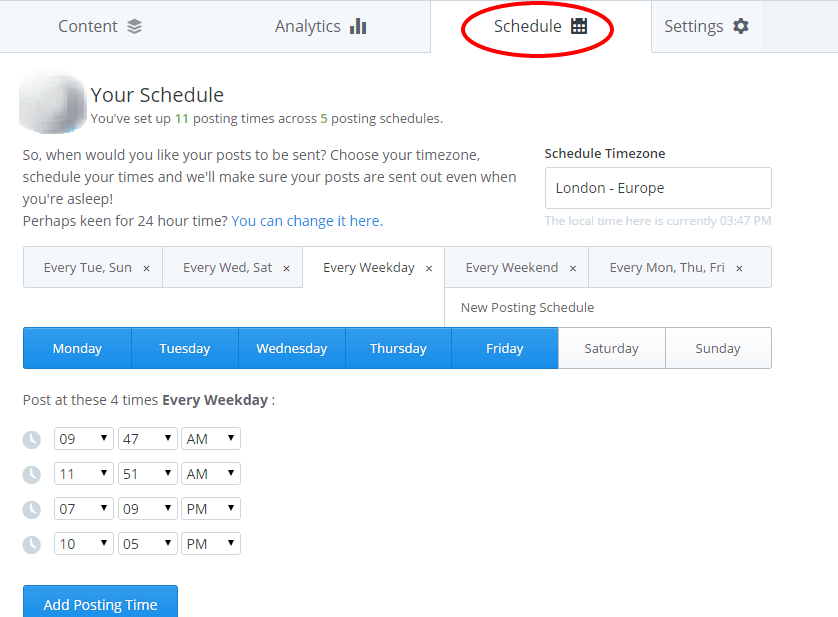
You can set different times for different days of the week, or set times for every day, every weekday, or every weekend.
Start buffering posts
Now, you’re ready to start adding posts to your Buffer to share. There are a range of ways to do this.
1. Add posts on the Buffer website
Enter the text and any links you want to share in the box at the top of your list of updates. If you have more than one account connected, you can select which accounts the post should be shared with and, if one of those is a Facebook account, you will get a preview of how the link will appear.
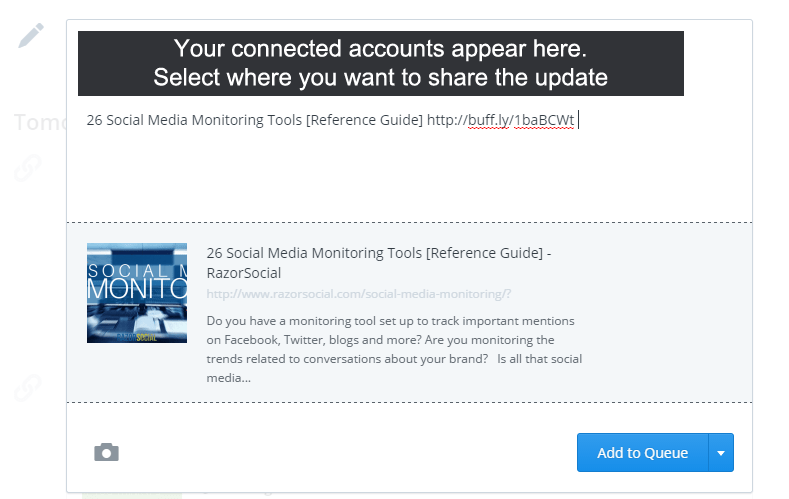
Then, you simply click ‘Add to Queue’ and the post will be sent out in due course.
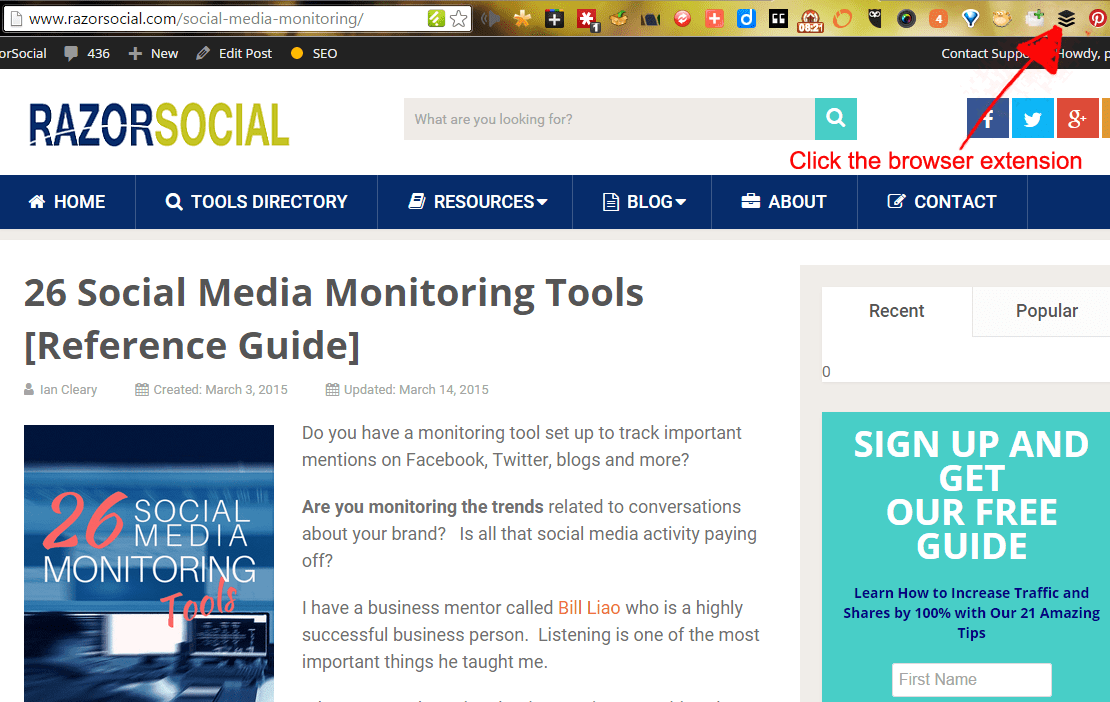
2. Share posts with the Buffer browser extension
You can go to any blog post or website and share it directly by clicking the browser extension button. A similar pop-up (as shown above) will appear containing suggested text to be shared, which is normally the title of the page, and a short link to this page. Edit the text for the update, choose which accounts you want to share it through and then add it to your queue.
3. Buffer a Retweet in Twitter
The ability to buffer retweets is really useful. With tools like Hootsuite, you can only schedule retweets if they are in the old format (e.g. RT @razorsocial…) whereas, with Buffer, you can schedule newer-style retweets from the Twitter website.
When the extension is installed, underneath each tweet you will see the Buffer icon.
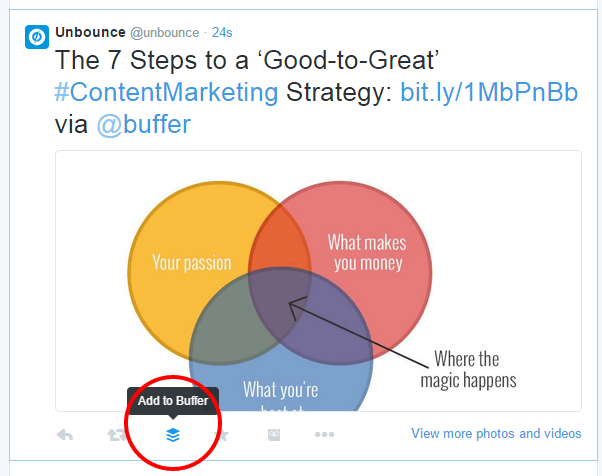
When you click the Buffer icon, the familiar interface will pop up and you can schedule the retweet to be shared from whichever Twitter accounts you choose.
4. Share an image via Buffer
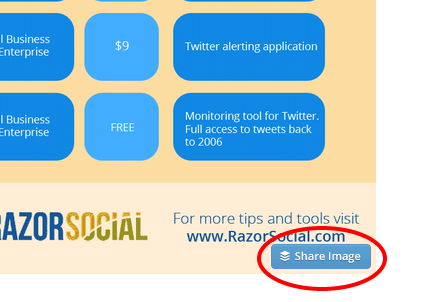
Images capture people’s attention and can encourage engagement and clicks on social media. Buffer’s extension lets you share the images you find on the web.
If you have the extension installed, when you hover over an image, a “Share Image” button appears in the bottom right-hand corner.
Occasionally, this button does not show up. In that case, you can right click on an image and choose ‘Buffer this image’.
In both cases, this then brings up the pop-up box so you can customize the update.
5. Share highlighted text with Buffer
A Buffer hack that not many people know about is the ability to highlight text and schedule it to post on social media.
No more copying and pasting!
As long as you have the extension installed, all you have to do is highlight some text on a page and right click.

Next, choose ‘Buffer selected text’ and the pop-up box will appear for you to schedule it.
Choose When to Share Your Posts – Beyond ‘Add to Buffer’
As well as adding posts to the end of your Buffer queue, there are more options available.
When you share a post, instead of clicking ‘Add to Buffer’, click the triangle next to it and you will see three dropdown options:
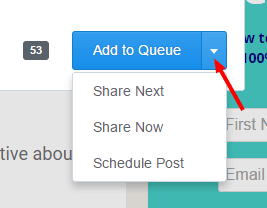
You can click
- ‘Share Next’ to add the update to the top of your Buffer queue;
- ‘Share Now’ to post it immediately, or
- ‘Schedule Post’ to choose a specific date and time to send the update.
When you are scheduling an update, you can also click ‘New Scheduler’ at the top of the pop-up box.
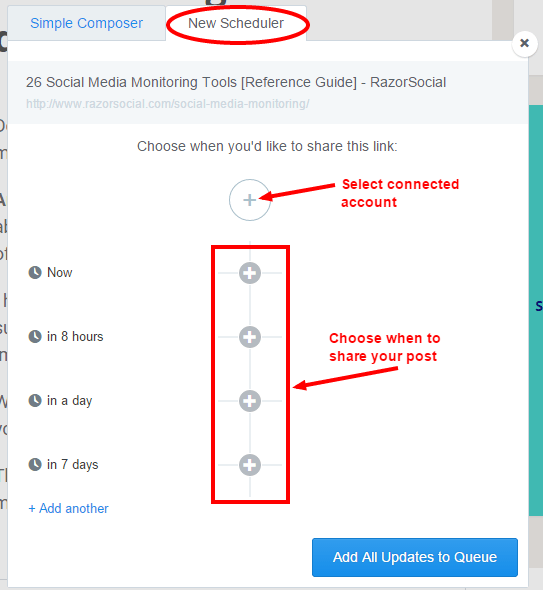
This is especially useful for promoting new blog posts and content. You can share it out at set intervals to make sure your contacts in different time zones, who are online at different times, see it.
Find Content to Share with Feeds and Suggestions
Do you ever run out of content ideas to share? BufferApp can help you in two ways:
Feeds

You can add RSS feeds to your Buffer account. These do not add new posts to your Buffer automatically, but you can easily add new content to your queues with the ‘Add’ button.
Suggestions
Buffer provides a list of 25 hand-curated suggested posts, every day, that you might want to share. These are not specific to your niche or industry, but there is a nice mix of content to choose from. These can be added to your Buffer by clicking the ‘Add’ button next to each link.
Check Your Analytics on Buffer
You can access analytics on Buffer by moving away from the Content tab to the Analytics tab.

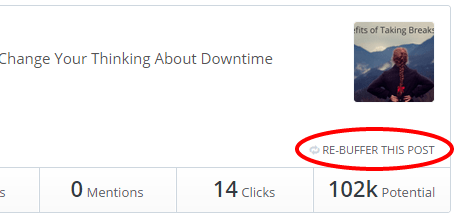
Here, you can look at the posts you have sent and see the engagement they got. This tweet, for example, got four retweets, five favorites and 14 clicks.

You can look at the analytics of the posts you have sent out in order of Most Popular, Least Popular, or by time.
Five Top Buffer Hacks and Facts You Might Not Know
1. If you see that one of your updates performed really well in analytics, you can hover over the update and click ‘Re-Buffer this post’ to add it to your queue again.
2. You can drag updates between connected accounts using your mouse – just drag and drop into the correct place.
3. Add images to your posts by clicking on the camera icon in the update box.
4. Buffer is a channel on IFTTT (Zapier integration also supported) and posts you read on Feedly can also be added to Buffer queues.
5. WordPress plugins like Buffer My Post are available that can add links to your Buffer to keep sharing your old blog content.
So, that’s it! We went through all the key tips to help you understand how to use Buffer to efficiently manage your social media accounts.
What’s next?
Do you use BufferApp for social media management? Did you know about all these features?
Which will be the most useful for you?