Are you looking for a social media management tool that provides good automation options?
SocialOomph has some really useful functionality, particularly around the area of social media automation. You might not need all of the functionality all the time, but there are some parts of SocialOomph that are really worth using.
What are the Main Features?
The features depend on the licensing option you choose.
Twitter Unlimited
If you are only interested in automating your Twitter marketing, the Twitter Unlimited functionality may suit you. With this option, you don’t get access to any other social networks, so it is most suitable for people who want to focus all their energy on Twitter.
The functionality available for Twitter Unlimited can be broken down as follows:
- Posting – You can post content, schedule content, upload content to be posted, send tweets via email, enable short URLs and purge any DMs in your account.
- Following – You can automatically follow people people and automatically send a DM (not advisable).
- Monitoring – You can monitor tweets related to channels that SocialOomph automatically sets up, e.g. tweets from celebrities, musicians etc. (This isn’t very useful, though with the professional edition you can set up your own monitoring). You can get an email with a summary of any tweets related to specific keywords, monitor your retweets or mentions and view statistics on your account related to any short URLs you have shared, or items such as follower count.
Note: I find the most powerful functionality for Twitter Unlimited is the ability set up a a batch of tweets that is sent out from a queue that is continuously recycled. For example, you can set it up so that your older blog posts are sent out on Twitter on a regular basis.
Professional
The Professional edition gives you all the Twitter functionality above, along with the following Twitter features:
- Run Twitter searches to find people worth following.
- Track competitors’ followers.
- Automatically create Twitter lists, for example you can create a list of people who mention your name.
- Various controls are in place to weed out any spammy or low-quality Twitter accounts. This means that you are only looking at the good ones.
Other features as part of Professional:
- Send scheduled updates from Facebook, LinkedIn (groups, pages and individual updates), Plurk and App.net
- Set up an RSS feed to post content from your blog
- Submit updates to social channels via email (your whole team could do this)
- Manage your Twitter accounts through the Tweetcockpit
- Other features: there are other, smaller features also available, such as the ability to delegate account management to your assistant,
How does it work?
There are lots of features available, so we have picked out three examples to give you an idea of the functionality.
1. Sending scheduled updates from a queue
When you write great content that is evergreen (content that is as valid now as it was six months ago, or as it will be in 6 months’ time), why not share it regularly? Given how much time you spend writing great blog posts, why don’t you share these again and again?
You can set this up in SocialOomph.
You create a queue of content and SocialOomph will pick out items from the queue on a continuous basis, and send it at the times you specify. This is how you set it up:
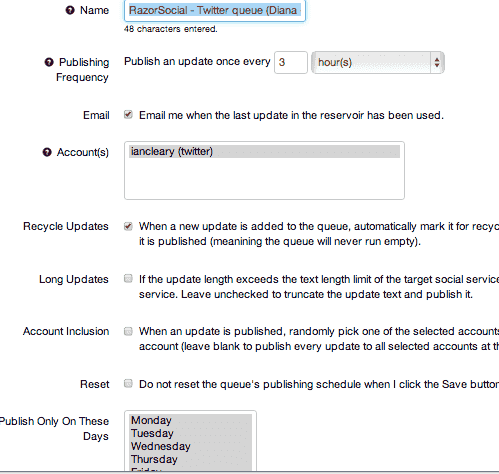
Create a queue resorvoir
You set up a queue and you specify details such as how often SocialOomph should post content from the queue, which days you want content taken from the queue, the start date etc.
Now you need to add content to the queue. The following interface is used for creating normal and scheduled updates for the different social platforms.
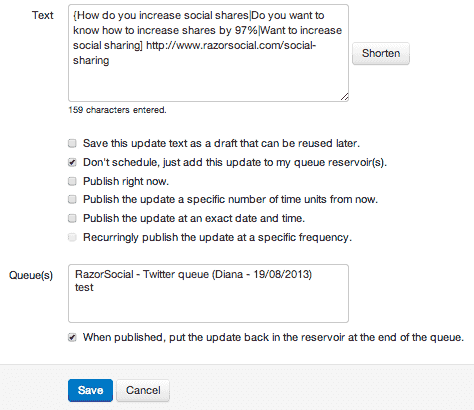
In the example above, in the ‘text’ section I have created three different possible tweets. To do this, you start off your tweet with ‘{‘ and end it with ‘}’. You separate each tweet with a ‘|’. This means that, in the above example, there will be three tweets generated:
- How do you increase social shares https://razorsocial.com/social-sharing
- Do you want to know how to increase social shares by 97% – https://razorsocial.com/social-sharing
- Want to increase social sharing – https://razorsocial.com/social-sharing
Having multiple variations of the tweet helps to ensure people don’t remember seeing the same tweet twice! It also helps to make sure they will all be delivered, because Twitter doesn’t like posting duplicate tweets in quick succession.
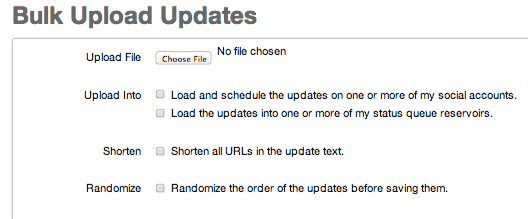
2. Bulk loading Updates
You can create a file full of social media updates and then import the file to SocialOomph. When it imports, you can get all your web addresses shortened and you can automatically add your updates to a queue reservoir.
3. Create updates via email
This is a handy feature (only available with professional licensing). You can send updates to social networks via email. For example, if want to send an update to Twitter you include the body of the tweet in the subject line. If you want to add a URL to the tweet, you can add this to the body of the email.
If you’re in the middle of dealing with your email and you have an idea for a status update, this will often be the quickest way to send it.
How much does it cost?
- There is a free version with limited functionality
- Twitter Unlimited is $6.97 every two weeks.
- Social Media Professional is $17.97 every two weeks.
Summary
The user interface of SocialOomph is really poor, but it does have some good functionality. I use the queue reservoir feature because it’s great to recycle your tweets for older blog content. I add evergreen blog content to the queue and automatically share out content every three hours, with three different versions of each tweet. This means it’s at least three months before anyone sees the tweet again!
SocialOomph is not a complete solution for all your social media management needs, but it’s worth investigating specific areas of its functionality to see if it will help make you more efficient.
Have you used SocialOomph? What do you think of it?
We would love to hear your thoughts.
Related Posts
This post gives you other tools that you can use with the one above -> Social Media Management Tools